POINT
A precise location or place on a plane. Usually represented by a dot, a cross or an x. Since a point is a place, not a thing, it has no dimensions. We label points with capital letters.
LINE
A geometrical object that is straight, infinitely long and infinitely thin. A line is one-dimensional. It has zero width. Using two points, we can create only one line.
 |
| In the figure above, the line PQ passes through the points P and Q, and goes off in both directions forever, and is perfectly straight. A line, strictly speaking, has no ends. |
VERTICAL AND HORIZONTAL LINES
A vertical line is one which runs up and down the page.
A horizontal line is one which runs left-to-right across the page. It comes from the word 'horizon', in the sense that horizontal lines are parallel to the horizon.
 |
| horizon |

RAY
A portion of a line which starts at a point and goes off in a particular
direction to infinity. One way to think of a ray is a line with one end. The point where the ray starts is called the endpoint. A ray is one-dimensional. It has zero width. A ray has no measurable length, because it goes on forever in one direction.
 |
| P is the endpoint |
LINE SEGMENT
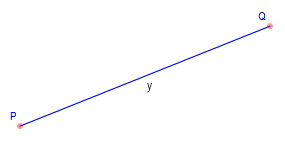
A straight line which links two points
without extending beyond them. A line segment is one-dimensional. It has a measurable length, but has zero
width.
 |
| P and Q are the endpoints of the line segment y |
MIDPOINT OF A LINE SEGMENT
A point on a line segment that divides it into two equal parts. The halfway
point of a line segment.
 |
| M is the midpoint P and Q are the endpoints of the line segment |
INTERSECTION OF LINES
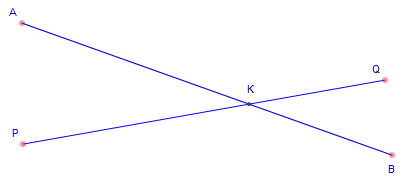
The point where two lines or two line segments meet or cross.
Animation.
 |
| In the figure above we would say that "point K is the intersection of line
segments PQ and AB". Another way it may be said is that "the line segment PQ intersects AB at point K". |
Lines are parallel if they lie in the same plane, and are the same distance apart over their entire length. No matter how far you extend them, they will never meet.
PERPENDICULAR LINES
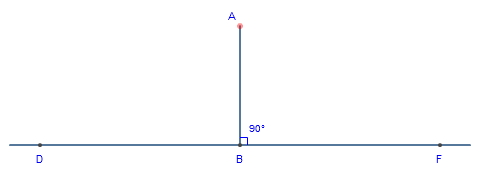
A line is perpendicular to another if it meets or crosses it at right angles (90°).
Animation.
 |
| AB is perpendicular to DF |
CIRCLE
Language and notation of the circle
A circle is a line forming a closed loop, every point on which is a fixed distance from a center point.
A circumference is how far you have to go around the circle or if you put a string on the circle, how long will the string have to be.
There is a difference between a circle and a disk. A circle is a line, and so, for example, has no area - just as a line has no area. A disk however is a round portion of a plane which has a circular outline. If you draw a circle on paper and cut it out, the round piece is a disk.
Radius animation.
Diameter animation.
Arc animation.
Sector animation.
Tangent animation.
Secant animation.
A review of circles:
PLANE
A flat surface that is infinitely large and with zero thickness. The plane has two dimensions: length and width. But since the plane is infinitely large, the length and width cannot be measured.
PARALLEL PLANES
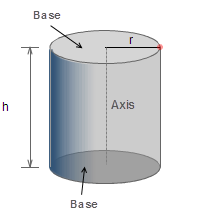
A flat surface that is infinitely large and with zero thickness. You can think of parallel planes as sheets of cardboard one above the other with a gap between them. Parallel planes are the same distance apart everywhere, and so they never touch.
 |
| The two bases of this cilinder are parallel planes |
INTERSECTING PLANES
If two planes are not parallel, then they will intersect (cross over) each other somewhere. Two planes always intersect at a line, as shown on the right.
This is similar to the way two lines intersect at a point.
SOLID GEOMETRY
When making technical drawings, REMEMBER:
- DATA: Use your 0,4 technical pen. (You will often find data given)
- AUXILIARY or CONSTRUCTRIONS LINES AND ARCS: Use your 0,2 technical pen.
- SOLUTIONS or RESULTS: Use your 0,8 technical pen.
If you are not using your technical pen but pencils:
- DATA: Use your HB pencil. (You will often find data given)
- AUXILIARY or CONSTRUCTRIONS LINES AND ARCS: Use your 2H-3H... pencil.
- SOLUTIONS or RESULTS: Use your HB pencil underlining twice.


No comments:
Post a Comment
Recuerda incluir SIEMPRE tu nombre, inicial de tu apellido y el curso (incluye la letra de tu grupo)