Sunday 24 September 2017

Parallel, Perpendicular and Intersecting lines


How do we use the set square?
You have to handle your set square softly and with accuracy without exercising too much pressure on them, only the needed one to avoid movement.

PARALLEL LINES
  1. The 45 set square hypotenuse (longest side) is placed attached to the line to which we want to draw the parallels (GUIDE).
  2. The 60-30 set square hypotenuse is attached to the 45 set square leg.
  3. Fix the 60-30 set square and move the 45 set square upwards or downwards drawing the desired parallel lines along its hypotenuse.
PERPENDICULAR LINES

If we want to draw perpendicular lines to one direction, we will have to follow the first two steps as stated for parallel lines and then the following ones:
  1. Having fixed the 60-30 set square, the 45 set square is turned until the other leg is attached to the hypotenuse of the 60-30 set square.
  2. Draw the perpendicular line along the hypotenuse of the 45 set square.

Let's review how to draw parallel and perpendicular lines using the triangular set squares.
 

For left-handed (zurdos):


Link to the task                Example of task

Friday 22 September 2017

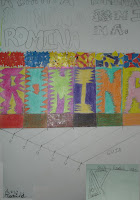
The first task: Typography - your names


This is a task I like doing when we begin a new course. It let me get to know you, learn your names and, by the way, we work with a "popurrí" of items which will be a review of EPVA: elements of art and technical drawing (parallelism, perpendicularity, Thales), image, typography, visual elements (dots, lines, shapes, colours, textures), design process, sketching ...

You will see your artworks published in this blog very soon....

Reviewing the elements of Art

Wednesday 20 September 2017

Pencil scale


You will need:
  1. 2H pencil - for technical drawing
  2. HB pencil - for writing and sketches

Thursday 14 September 2017

Who are you?


Publishing comments on this blog sometimes will be a task in order to answer a question, give your opinion, do a challenge, ...
Therefore, I want you to begin with the first one:

I would like you to introduce yourselves.

1. Just click on "X comments", under this post.
2. Go to the bottom of the article:
3. Write your name followed by the initial of your surname and your course.
You can tell me about your hobbies or whatever you want to share with us.
Example: Nadia C. 1st A. Hello teacher. My hobbies are basketball and dancing.
4. Publish!
I moderate your comments, so, you will not see yours immediately.

Art classroom rules

On your mark, get set, GO! Visual Arts 2017/2018


1st A, B and C, 2nd A, B, C and D: this year I am going to be your Visual Arts teacher.

Hope we have a great time learning content and language and... MAKING ART together!

The countdown is going to start:
And... by the way, we will use and learn new technologies (but... without forgetting the traditional techniques).


And everything LOVING ART!